Overclocking Your CPU for Gaming: A Beginner’s Guide
Overclocking your CPU can significantly enhance gaming performance by increasing its clock speed beyond factory settings, allowing for smoother gameplay and higher frame rates, but it requires careful attention to cooling and stability to avoid potential hardware damage.
For PC gamers, the pursuit of every extra frame per second (FPS) is a constant quest, and one potent, yet often misunderstood, method to achieve this is Overclocking Your CPU: A Beginner’s Guide to Increased Gaming Performance. This process involves pushing your processor beyond its default operating specifications to unlock additional processing power, potentially transforming your gaming experience.
Advertisements
Understanding CPU Overclocking Fundamentals
Overclocking, at its core, is about making your CPU work harder and faster than its manufacturer intended. This isn’t a dark art, but rather a methodical process of fine-tuning voltage and frequency settings to extract more performance. While it might sound daunting, with the right knowledge and precautions, it’s a manageable endeavor for many PC enthusiasts.
The primary appeal of overclocking for gamers lies in its ability to improve game responsiveness and frame rates. A faster CPU can process more instructions per second, which reduces bottlenecks and allows your graphics card to perform at its peak, particularly in CPU-intensive games or scenarios where many background tasks are running.
What is CPU Frequency and Voltage?
To embark on the overclocking journey, understanding frequency and voltage is crucial. CPU frequency, measured in gigahertz (GHz), dictates how many calculation cycles your processor performs per second. Voltage, on the other hand, is the electrical power supplied to the CPU. Increasing frequency often requires a corresponding increase in voltage to maintain stability, but too much voltage can lead to excessive heat and permanent damage.
- 📈 Frequency (Clock Speed): The speed at which your CPU processes instructions. Higher numbers mean more operations per second.
- ⚡ Voltage (Vcore): The power delivered to your CPU. Essential for stability at higher frequencies but must be managed carefully.
- 🌡️ Temperature: A critical factor. Overclocking generates more heat, requiring robust cooling solutions.
The relationship between these three elements is delicate. Push frequency too high without enough voltage, and your system becomes unstable. Provide too much voltage, and you risk overheating and degrading your CPU much faster. It’s about finding that sweet spot where performance gains are maximized without compromising system integrity.
Ultimately, a successful overclock hinges on a stable system that can sustain its boosted performance under load, especially during intense gaming sessions. This process also involves extensive testing and monitoring to ensure that the increased performance is reliable and doesn’t lead to crashes or system instability.
Pre-Overclocking Checklist: Essential Preparations
Before you even think about tweaking settings, thorough preparation is paramount. Overlooking any of these steps could lead to system instability, data loss, or even hardware damage. This isn’t a race; it’s a carefully executed plan.
Gathering the Right Hardware
Not all CPUs are created equal when it comes to overclocking. Intel CPUs with a “K” suffix (e.g., i7-13700K) or AMD CPUs are typically unlocked and designed for overclocking. Your motherboard also plays a critical role, as higher-end boards often have better power delivery systems (VRMs) and more robust BIOS options essential for stable overclocking.
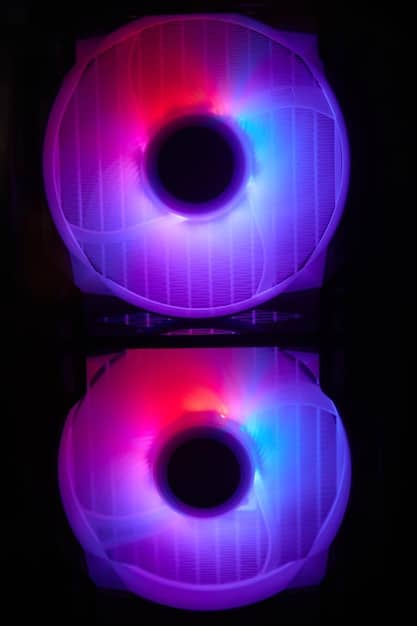
Most importantly, cooling is king. Overclocking generates significant heat, and inadequate cooling is the quickest path to system throttling or damage. A high-quality air cooler or an All-in-One (AIO) liquid cooler is highly recommended. Custom loop liquid cooling offers the best performance but is also the most complex and expensive solution.
- ✅ Unlocked CPU: Ensure your CPU allows for overclocking (e.g., Intel “K” series, most AMD Ryzen).
- 📊 Robust Motherboard: A motherboard with strong VRMs and comprehensive BIOS features.
- 🧊 Adequate Cooling: A high-performance air cooler, AIO, or custom liquid cooling system.
Equally important are a reliable power supply unit (PSU) with enough wattage to handle the increased power draw and sufficient RAM, preferably high-speed RAM, as memory performance can also impact overall system responsiveness after a CPU overclock.
Software Tools and BIOS Navigation
You’ll need specific software tools for monitoring and stress testing. Programs like HWMonitor or HWiNFO64 are essential for keeping an eye on CPU temperatures, voltages, and clock speeds. For stress testing, Prime95 or AIDA64 can push your CPU to its limits, revealing any instabilities.
Your computer’s BIOS (Basic Input/Output System) or UEFI (Unified Extensible Firmware Interface) is where all the magic happens. Accessing it usually involves pressing a specific key (like Del, F2, F10) during boot-up. Familiarize yourself with its layout, particularly the sections related to CPU voltage, frequency, and fan control. Modern motherboards often have “EZ Modes” or “Advanced Modes”; always opt for the Advanced Mode for granular control.
It is crucial to back up any important data before beginning the overclocking process, as system instability or crashes, while attempting to find stable settings, can sometimes lead to data corruption. Take the time to ensure all drivers are updated to their latest versions, as outdated drivers can sometimes interfere with system stability.
Step-by-Step Overclocking Process
This is where the real work begins. The process is iterative: make a small change, test, and repeat. Patience is a virtue here, as rushing can lead to frustration or worse.
Setting a Baseline and Making Incremental Changes
Before any changes, establish a baseline. Note your CPU’s current idle and load temperatures and performance metrics. This will help you track progress and identify any regressions. Start with small increments. For example, increase your CPU’s core ratio (multiplier) by 0.1-0.2 GHz at a time. The core ratio, when multiplied by the base clock (BCLK), determines your CPU’s final clock speed.
After each increase in clock speed, run a quick stability test, often with a lightweight benchmark or even a short gaming session. If stable, repeat the process. If unstable (crashes, freezes, blue screens), you’ve likely hit a wall for that voltage. This is where voltage adjustments come in.
Adjusting Voltage and Stress Testing
When instability arises at a new clock speed, slightly increase your CPU’s core voltage (Vcore) in small increments (e.g., 0.005V or 0.01V). Be cautious: too much voltage can generate excessive heat and accelerate CPU degradation. Always aim for the lowest stable voltage for a given frequency.
- 📈 Increase CPU Multiplier: Start with small increments (e.g., +1 or +2) in your BIOS.
- 🔄 Test Stability: Run a quick stress test or benchmark after each frequency increase.
- ⚡ Adjust Vcore: If unstable, increase Vcore slightly (e.g., +0.01V) and retest.
- 🌡️ Monitor Temperatures: Keep a close eye on CPU temperatures; typically, aim for below 85°C under load.
After reaching a seemingly stable overclock, it’s time for extensive stress testing. Run demanding stability programs like Prime95 (Small FFTs or Blend) or AIDA64 for several hours. This will expose any latent instabilities that weren’t apparent during quick tests. Monitor temperatures diligently throughout this process. High temperatures (above 90°C consistently) indicate insufficient cooling or excessive voltage.
The goal is to find the highest stable frequency with the lowest possible voltage that maintains safe operating temperatures. This balance is critical for longevity and performance. If temperatures become too high, either reduce the clock speed, lower the voltage, or invest in better cooling.
Optimizing Settings for Gaming Performance
With a stable CPU overclock in place, the next step is to refine your system for maximum gaming benefit. This involves not only ensuring the overclock performs well but also considering other system components that can influence overall gaming responsiveness.
Memory (RAM) Overclocking and Timings
While often overshadowed by CPU overclocking, RAM speed and timings significantly impact gaming performance, especially on platforms like AMD Ryzen. Faster RAM can provide more bandwidth for your CPU, leading to better frame rates and smoother gameplay. Most modern motherboards allow for easy XMP (Extreme Memory Profile) or DOCP (Direct Over Clock Profile) activation in the BIOS, which automatically sets your RAM to its advertised speeds and timings.
For advanced users, manual tuning of memory timings and frequencies can yield further gains, but this is a more complex process and carries its own risks. Start with enabling XMP/DOCP, and only venture into manual RAM tuning once your CPU overclock is rock solid.
Power Management and BIOS Settings
Proper power management settings are crucial to maintain your overclock’s stability and performance. In your operating system’s power options, set the power plan to “High Performance” (Windows). Within the BIOS, disable any CPU power-saving features like C-states or Enhanced Intel SpeedStep Technology (EIST) if they cause instability, as these can dynamically lower your CPU’s clock speed and voltage when idle.
Experiment with disabling these settings one by one to see their impact on stability and temperatures. While power-saving features are great for everyday use, they can sometimes interfere with a finely tuned overclock’s consistent performance during gaming loads.
Testing and Benchmarking In-Game
The ultimate test of your overclock is how it performs in actual games. Play your favorite titles, especially those that are CPU-intensive. Use in-game benchmarks or third-party tools like MSI Afterburner (with RivaTuner Statistics Server) to monitor FPS, CPU utilization, and temperatures while gaming.
Look for consistent frame rates, minimal stuttering, and overall smoothness. Compare performance to your pre-overclocking baseline. If you notice significant gains without instability, you’ve likely succeeded. If performance is inconsistent or you experience crashes, it’s back to the drawing board for further tweaks or voltage adjustments.

Pay close attention to frame time consistency, as jagged frame times can make gameplay feel choppy even if the average FPS is high. A stable overclock should result in smoother frame delivery, enhancing the overall gaming experience.
Common Challenges and Troubleshooting
Overclocking isn’t always smooth sailing. You’re likely to encounter a few bumps along the road. Knowing how to troubleshoot common issues can save you a lot of time and frustration.
System Instability and Crashes
The most frequent issue is system instability. This can manifest as blue screens of death (BSODs), application crashes, system freezes, or unexpected reboots. The primary culprits are usually insufficient voltage for the desired clock speed or excessive temperatures. When a crash occurs, note any error messages or codes, as they can provide clues.
If you experience instability:
- 📉 Lower Clock Speed: Reduce your CPU multiplier by one step.
- ⚡ Increase Vcore: Incrementally increase the Vcore by very small amounts.
- 🌡️ Check Cooling: Ensure your cooler is properly seated and fans are operating effectively. Clean any dust buildup.
- 🔄 Reset CMOS: If the system won’t boot, use the CMOS clear jumper on your motherboard to reset BIOS settings to default.
Always make one change at a time when troubleshooting. This allows you to isolate the variable causing the problem. If increasing voltage doesn’t stabilize it at a certain frequency, that frequency might be unattainable for your CPU and cooling setup.
Overheating and Thermal Throttling
Heat is the enemy of performance and longevity. If your CPU temperatures consistently hit critical levels (typically above 90-95°C under load), your system will automatically reduce clock speeds (thermal throttling) to prevent damage. This defeats the purpose of overclocking.
To combat overheating:
- ⬇️ Reduce Vcore: Even small reductions can significantly lower temperatures.
- 🌡️ Improve Cooling: Reapply thermal paste, ensure proper cooler mounting pressure, or upgrade your cooler.
- 🌬️ Enhance Case Airflow: Add more case fans or optimize existing fan placement for better intake and exhaust.
Monitoring temperatures diligently with tools like HWMonitor is critical. If you constantly hit thermal limits, you might need to settle for a lower, more stable overclock or invest in superior cooling solutions.
Performance Degradation and Long-Term Stability
While rare with sensible overclocking, excessive voltage over prolonged periods can lead to CPU degradation, meaning your chip loses its ability to hold stable at previously achievable frequencies or requires higher voltage for the same speeds. This is why incremental voltage increases and extensive stress testing at safe temperatures are crucial.
Prioritize stability and longevity over chasing the absolute highest clock speed. A slightly lower, perfectly stable overclock that runs cooler will provide a better, more consistent gaming experience and ensure your hardware lasts longer.
Benefits and Risks of CPU Overclocking
Like any performance modification, overclocking comes with its own set of advantages and potential drawbacks. A well-informed decision requires weighing these factors carefully.
Unlocking Gaming Potential
The most immediate and appealing benefit for gamers is the potential for increased frame rates and smoother gameplay. In CPU-bound games, an overclocked processor can significantly reduce bottlenecks, allowing your powerful graphics card to be fully utilized. This translates to a more fluid, responsive, and immersive gaming experience, particularly in competitive titles where every frame counts.
Beyond raw FPS, overclocking can also improve minimum frame rates, which are often more important for perceived fluidity than average FPS. It also extends the lifespan of older hardware by breathing new life into a system that might otherwise struggle with modern titles.
The Risks Involved
Despite the potential benefits, several risks are associated with overclocking:
- 🔥 Overheating and Hardware Damage: The biggest risk. Excessive heat can permanently damage your CPU and motherboard components.
- 📉 System Instability: Frequent crashes, freezes, and data corruption are possible if settings are unstable.
- ⚡ Voiding Warranty: Most manufacturers consider overclocking outside of specified operating conditions and may void your warranty if damage occurs.
- 🔌 Increased Power Consumption: A higher voltage and frequency draw more power, leading to increased electricity bills and heat generation.
While these risks are real, they can be largely mitigated with careful research, incremental adjustments, diligent monitoring, and conservative voltage settings. It’s not a set-and-forget process; it requires ongoing attention to temperatures and stability.
Future-Proofing Your Gaming Rig (and When Not To Overclock)
Overclocking isn’t a magical solution for all performance woes, nor is it always necessary. Understanding its place in the broader context of PC performance is crucial.
Maximizing Current Hardware Investment
For many gamers, overclocking represents a cost-effective way to squeeze more life out of their existing hardware. Instead of immediately upgrading to a new CPU, a well-executed overclock can provide a noticeable performance uplift, delaying the need for a full system overhaul. This can save money and provide a satisfying sense of accomplishment from optimizing your own machine.
It’s particularly beneficial for those with high-refresh-rate monitors who want to maximize their frame rates without breaking the bank on the latest components. Overclocking can bridge the gap between “good enough” and “great” performance.
When Overclocking Might Not Be Worth It
There are scenarios where overclocking might not be beneficial or even advisable. If your system is already hitting extremely high frame rates in your desired games (e.g., consistently above your monitor’s refresh rate), the gains from overclocking might be negligible. In GPU-bound scenarios, where your graphics card is the primary bottleneck, a CPU overclock will offer little to no improvement.
Furthermore, if you are uncomfortable with the risks, lack adequate cooling solutions, or simply prefer the peace of mind that comes with stock settings and manufacturer warranties, then overclocking might not be for you. It requires a certain level of technical comfort and willingness to experiment.
Ultimately, overclocking is a powerful tool for performance enthusiasts. It offers the chance to fine-tune your system for optimal gaming performance, but it’s a journey best undertaken with patience, thorough research, and a healthy respect for the hardware you’re manipulating.
| Key Point | Brief Description |
|---|---|
| 🚀 Performance Boost | Increase CPU clock speed for higher frame rates and smoother gaming. |
| 🧊 Cooling is Key | Essential for managing increased heat; prevents damage and throttling. |
| 🛠️ Gradual Adjustments | Make small, incremental changes to frequency and voltage with testing. |
| ⚠️ Risk vs. Reward | Potential for hardware damage vs. significant performance gains. Consider carefully. |
Frequently Asked Questions About Overclocking Your CPU
▼
Overclocking can be safe if done cautiously and correctly. It requires proper cooling, incremental voltage adjustments, and thorough stress testing. Excessive voltage or heat can damage your CPU, but with careful monitoring and adherence to best practices, the risks are significantly minimized for most modern processors.
▼
You’ll need an unlocked CPU (e.g., Intel “K” series, most AMD Ryzen), a robust motherboard with strong power delivery, and, most critically, an excellent cooling solution like a high-end air cooler or an AIO liquid cooler. A reliable power supply is also important to handle increased power draw.
▼
Typically, yes. Most CPU manufacturers state that overclocking voids the warranty because it pushes the component beyond its specified operating conditions. While damage from a moderate and well-executed overclock is rare, any issues arising from it might not be covered by the manufacturer’s warranty.
▼
Performance gains vary widely depending on your specific CPU, cooling, and the game you’re playing. In CPU-bound games, you might see 5-15% or even higher FPS improvements, especially in minimum frame rates. In GPU-bound scenarios, the impact will be minimal. It’s often more about smoothing out gameplay than massive overall FPS increases.
▼
If your system becomes unstable (crashes, freezes), the first step is to reduce your clock speed or slightly increase your CPU voltage. If it won’t boot, you may need to clear your motherboard’s CMOS (BIOS battery) to reset settings to default. Always make one change at a time and test thoroughly to pinpoint the instability cause.
Conclusion
Overclocking your CPU for increased gaming performance is a journey into fine-tuning and optimization, offering tangible benefits for the enthusiast willing to invest the time and effort. While it presents inherent risks, the rewards of smoother gameplay, higher frame rates, and the satisfaction of maximizing your hardware can be substantial. By adhering to a methodical approach—prioritizing robust cooling, making incremental adjustments, and rigorously testing for stability—gamers can unlock new levels of performance from their existing systems. Remember that patience, continuous monitoring, and a healthy understanding of the underlying principles are your most valuable tools in this pursuit of gaming excellence. For those seeking to push the boundaries of their gaming rig, a well-executed CPU overclock can indeed be a game-changer.


