Unlocking 144Hz: Optimize Your Monitor for Competitive Gaming

Maximizing your monitor’s 144Hz refresh rate is crucial for competitive gaming, providing smoother visuals and reduced input lag, which translates to a significant performance advantage for players seeking precision and speed in fast-paced titles.
In the world of competitive gaming, every millisecond counts. While high-end graphics cards and powerful processors often grab the spotlight, one component frequently overlooked, yet profoundly critical, is your monitor’s refresh rate. Achieving and maintaining a true Unlocking 144Hz: A Step-by-Step Guide to Optimizing Your Monitor’s Refresh Rate for Competitive Gaming is not merely a luxury; it’s a fundamental advantage that can elevate your gameplay from adequate to exceptional, immersing you in a world where visual fluidity and responsiveness reign supreme.
Advertisements
Understanding Refresh Rate and Its Impact
Before diving into optimization, it’s essential to grasp what refresh rate truly means and why 144Hz stands out in the gaming community. Essentially, a monitor’s refresh rate defines how many times per second the display updates its image. Measured in Hertz (Hz), this specification directly influences the smoothness and clarity of motion on your screen. While standard monitors typically operate at 60Hz, 144Hz offers a substantial leap, showing 144 frames per second instead of 60.
This increased frequency significantly reduces motion blur, tearing, and stuttering, creating a far more fluid visual experience. For competitive gamers, this isn’t just about aesthetics; it’s about competitive edge. Smoother visuals mean less eye strain during extended play sessions and, more importantly, a clearer view of fast-moving targets, allowing for quicker reaction times and improved aim. The difference between 60Hz and 144Hz is often described as night and day, particularly when playing fast-paced first-person shooters or racing games where every frame matters.
The Science Behind Smoothness
The human eye can perceive more than 60 frames per second, contrary to some older misconceptions. While the exact threshold varies from person to person, studies and practical experience unequivocally demonstrate the benefits of higher refresh rates. Higher refresh rates also contribute to lower input lag, as the monitor processes and displays new frames more frequently, reducing the delay between your input and the on-screen action. This can be the difference between landing a critical headshot and being eliminated.
Consider the competitive landscape: professional esports players almost exclusively use high-refresh-rate monitors. This isn’t a mere preference; it’s an industry standard born from the tangible advantages it provides. Moving from a traditional 60Hz setup to a 144Hz display requires more than just plugging in a new monitor; it often involves ensuring your entire system can keep up, from your graphics card’s output capabilities to the correct cable types. Ignoring these factors will negate the benefits of your high-refresh-rate investment.
- Reduced Motion Blur: Objects appear sharper during movement.
- Eliminated Screen Tearing: Synchronizes frame output with display refresh.
- Lower Input Lag: Faster response to player actions.
- Enhanced Clarity: Easier to track fast-moving targets.
In conclusion, understanding refresh rate is the first critical step toward optimizing your gaming setup. A 144Hz monitor is not just a piece of hardware; it’s a gateway to a more responsive, visually superior, and ultimately more competitive gaming experience. Without properly configuring your system to harness its full potential, however, you’re leaving performance on the table, hindering your ability to react and perform at your peak.
Verifying Your Hardware Compatibility
Before you can truly unlock the full potential of 144Hz, you need to ensure that your entire system is up to the task. It’s not enough to simply own a 144Hz monitor; your graphics card, the cables connecting your monitor, and even your operating system settings all play crucial roles. Neglecting any of these components can result in you not actually experiencing 144Hz, despite your monitor’s capabilities, leading to frustration and underperformance.
The first point of inspection should always be your graphics card (GPU). Not all GPUs are created equal, and older or lower-end models may not support 144Hz refresh rates, especially at higher resolutions. Modern GPUs from NVIDIA (GeForce GTX 10 series or newer, RTX series) and AMD (Radeon RX 400 series or newer) generally support 144Hz at 1080p and even 1440p. Always check your GPU’s specifications to confirm its display output capabilities.
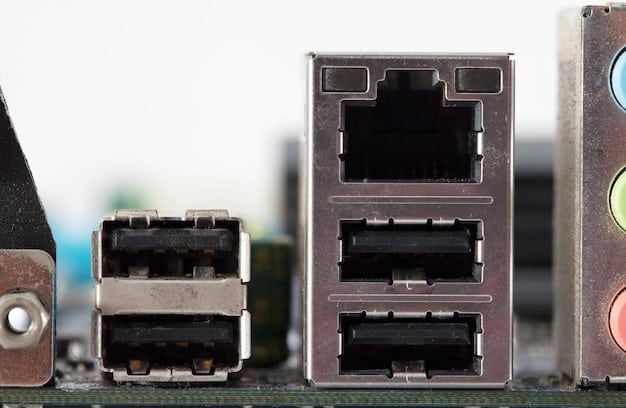
Choosing the Right Cable
Cable choice is a common pitfall. Many gamers unknowingly use outdated or insufficient cables that limit their refresh rate. For 144Hz, typically one of three cable types is required:
- DisplayPort (DP): This is the recommended and most versatile option. DisplayPort 1.2 or newer can easily handle 144Hz at 1080p and 1440p, and even higher resolutions with newer versions. It also supports adaptive sync technologies like FreeSync and G-Sync.
- Dual-Link DVI (DVI-D DL): While older, Dual-Link DVI cables can support 144Hz at 1080p. Single-Link DVI cables cannot. Ensure your monitor and GPU both have DVI-D DL ports if you plan to use this.
- HDMI: This gets tricky. Standard HDMI 1.4 typically maxes out at 120Hz for 1080p, and often only 60Hz for 1440p or 4K. To achieve 144Hz, you’ll generally need HDMI 2.0 or newer. Always check your monitor and GPU specifications for HDMI version compatibility.
Using the wrong cable, such as an HDMI 1.4 when your monitor and GPU support HDMI 2.0, will cap your refresh rate, preventing you from reaching 144Hz. It’s a simple fix, but one that many overlook. Invest in a good quality DisplayPort cable if you can, as it offers the most reliable and future-proof connection for high refresh rates.
Finally, ensure your monitor itself is indeed capable of 144Hz. Double-check its model number and specifications online. Some monitors are advertised with gaming features but might only support 120Hz or require specific settings to enable their highest refresh rate. Verifying your hardware compatibility upfront saves time and prevents potential headaches down the line, ensuring that every component in your signal chain can support the desired refresh rate.
In essence, hardware compatibility is the bedrock upon which your 144Hz experience is built. A powerful graphics card, the correct type of display cable, and a monitor explicitly designed for high refresh rates are non-negotiable. Without these foundational elements in place, any further optimization efforts will be futile, as your system simply won’t be able to transmit and display the necessary frame data to achieve the desired fluidity.
Configuring Windows for 144Hz
Once you’ve confirmed your hardware is capable of driving 144Hz, the next crucial step is ensuring your operating system, Windows in this case, is configured to utilize that refresh rate. By default, Windows often sets monitors to 60Hz, even if they’re more capable. Manually adjusting this setting is a simple yet vital process that many new users overlook, unwittingly capping their monitor’s performance.
The standard method involves navigating through your display settings. This is where you tell Windows to output frames at your monitor’s native high refresh rate. Misconfiguring this means your PC will continue sending 60 frames per second to a display that could show 144, effectively rendering your advanced hardware redundant for competitive gaming.
Step-by-Step Display Settings
Here’s how to set your monitor’s refresh rate to 144Hz in Windows:
- Right-click on an empty area of your desktop and select “Display settings.”
- Scroll down and click on “Advanced display settings” (Windows 10) or “Display adapter properties” (Windows 11, often found by clicking on the monitor you wish to adjust, then “Display adapter properties for Display 1”).
- In the new pop-up window, select the “Monitor” tab.
- Under “Monitor Settings,” you’ll find a “Screen refresh rate” dropdown menu. Click on it and select “144 Hertz.” If 144Hz is not available, ensure your cable is correct (DisplayPort or Dual-Link DVI/HDMI 2.0+), and your GPU drivers are updated.
- Click “Apply” and then “OK.” Your screen may flicker briefly as the change takes effect.
It’s important to verify that the change was successful. After applying, revisit the display settings to ensure it still shows 144Hz. Occasionally, the setting might revert if there’s an incompatibility or driver issue. If 144Hz doesn’t appear, troubleshoot your cable connection or consider updating your graphics drivers, as mentioned in the next section.
This setting only applies to the desktop environment and non-gaming applications. For most games, you will also need to configure the in-game settings separately, which we will cover next. However, ensuring Windows itself operates at 144Hz provides a consistent smooth experience for everything outside of dedicated gaming, improving general desktop fluidity and responsiveness, and confirming your system is ready for the gaming phase.
Ultimately, configuring Windows is the administrative backbone to enabling 144Hz. It’s where your operating system receives the directive to maximize your display’s capabilities. Without this foundational adjustment, even the most powerful hardware will be bottlenecked, preventing the user from experiencing the smooth, responsive visuals that are the hallmark of high-refresh-rate gaming setups.
Updating Graphics Drivers and Firmware
Even with the right hardware and Windows settings, an outdated graphics driver or monitor firmware can prevent you from achieving or maintaining 144Hz. These software components are the crucial intermediaries between your operating system, your graphics card, and your monitor, optimizing their communication and ensuring peak performance. Regular updates are not merely recommended; they are often essential for unlocking new features, improving stability, and ensuring compatibility with the latest display technologies.
Graphics card manufacturers like NVIDIA and AMD constantly release new driver versions. These updates often include performance optimizations for new game titles, bug fixes, and, critically for our purpose, enhanced support for display technologies and higher refresh rates. Running on old drivers is akin to driving a high-performance car with worn-out tires; you might have the potential, but you won’t reach optimal speed or handling.
Driver Update Process
For NVIDIA GPUs:
- Visit the official NVIDIA driver download page.
- Select your product type, series, product, and operating system.
- Download the latest Game Ready Driver or Studio Driver suitable for your use.
- Run the installer and follow the on-screen prompts. A clean installation is often recommended to remove any lingering old driver files.
For AMD GPUs:
- Go to the official AMD drivers and support page.
- Utilize the auto-detect and install feature or manually select your product.
- Download the latest Radeon Software Adrenalin Edition.
- Install the software, which includes the latest drivers and useful utilities.
Monitor firmware updates are less frequent but equally important. Sometimes, manufacturers release firmware updates to address bugs, improve display quality, or, specifically, to enhance compatibility with certain graphics cards or to enable higher refresh rates over specific connections. Check your monitor manufacturer’s support website (e.g., ASUS, Acer, Dell, BenQ) for your specific monitor model. Look for a “Support” or “Downloads” section, and if a firmware update is available, follow their instructions carefully, as an incorrect update can potentially brick your monitor.
Regularly updating both your GPU drivers and, if available, your monitor’s firmware is a proactive measure that ensures your display ecosystem is functioning optimally. This minimizes the chances of encountering issues that cap your refresh rate and maximizes the overall performance and reliability of your gaming setup. Many performance-related issues that users incorrectly attribute to hardware limitations are often resolved simply by updating these critical software components, unleashing the true capabilities of your 144Hz display.
In short, up-to-date drivers and firmware are the digital grease that keeps your display system running smoothly. They are vital for translating the raw power of your hardware into the seamless visual experience that 144Hz promises. Neglecting these updates means you might be artificially limiting your monitor’s potential, even after ensuring all physical connections and Windows settings are correct.
Optimizing In-Game Settings
Once your system and Windows are configured for 144Hz, the final, and perhaps most enjoyable, step is to optimize your in-game settings. While your monitor can display 144 frames per second, it’s your graphics card’s job to actually render those frames. If your game settings are too demanding for your GPU, it won’t be able to consistently produce 144 frames per second (fps), leading to a less-than-smooth experience despite your high refresh rate monitor. The goal is to achieve a stable frame rate that matches or exceeds your monitor’s refresh rate, ensuring maximum fluidity and responsiveness.
The first and most important step is to navigate to the game’s display or graphics settings. Most modern games will have an option to select your desired refresh rate. Always choose 144Hz if it’s available. If it’s not, you might need to adjust your in-game resolution or switch to fullscreen mode, as some games limit refresh rate options in borderless windowed mode. Setting this correctly ensures the game engine is actively trying to render frames at the highest possible rate for your display.
Balancing Graphics and Performance
Achieving a consistent 144fps means finding the right balance between visual quality and performance. Here are key settings to consider adjusting:
- Resolution: Lowering your resolution from 4K to 1440p or 1080p will significantly boost frame rates. While a higher resolution looks sharper, maintaining 144Hz is generally more beneficial for competitive play.
- Graphics Presets (Low/Medium/High/Ultra): Start with a lower preset and gradually increase settings until you find a balance where your FPS remains consistently near or above 144.
- Anti-Aliasing (AA): This smooths jagged edges but is very demanding. Options like FXAA or SMAA are less resource-intensive than MSAA or TAA. Consider disabling it entirely if you’re struggling to hit target FPS.
- Shadow Quality: Shadows can be incredibly taxing on your GPU. Reducing their quality or even disabling them can free up substantial resources.
- Post-Processing Effects: Bloom, depth of field, motion blur, and lens flares add visual flair but can impact performance. Disabling them often provides a significant FPS boost and a clearer image for competitive play.
- Texture Quality: This impacts VRAM usage more than raw FPS. If you have a GPU with sufficient VRAM (e.g., 8GB+), you can often keep this high without major performance hits.
Running an in-game FPS counter (many games have one built-in, or you can use tools like NVIDIA’s GeForce Experience overlay or Afterburner) is crucial. This real-time feedback allows you to see the immediate impact of your setting changes. Aim for a stable FPS that rarely dips below 144. If it consistently stays below your monitor’s refresh rate, you’ll experience micro-stutters and input lag, negating some of the benefits of 144Hz.
Furthermore, consider using adaptive sync technologies like NVIDIA G-Sync or AMD FreeSync if your monitor supports them. These technologies synchronize your monitor’s refresh rate with your GPU’s frame rate, eliminating screen tearing and reducing stuttering even when your FPS fluctuates below the maximum refresh rate, providing an even smoother experience. Activating these technologies usually only requires enabling them in your GPU’s control panel and within the monitor’s OSD (On-Screen Display) settings.
In summation, optimizing in-game settings is the final puzzle piece in truly experiencing 144Hz. It’s a dynamic process of fine-tuning your game’s visual fidelity to match your system’s rendering capabilities, ensuring a consistent and high frame rate. This precise balance is what transforms your high-refresh-rate monitor from an expensive display into a genuine competitive advantage, delivering uncompromised fluidity and responsiveness in every game.
Troubleshooting Common 144Hz Issues
Even after carefully following all the optimization steps, you might encounter issues that prevent your monitor from running at 144Hz or delivering a smooth experience. Troubleshooting is a systematic process of identifying and resolving these common pitfalls. Patience and methodical checking are key to getting your setup running perfectly.
One of the most frequent problems is the refresh rate reverting to 60Hz or not having 144Hz as an option in Windows settings. The first line of defense here is always the cable. Many users accidentally use an HDMI 1.4 or an old DVI cable that doesn’t support the bandwidth required for 144Hz. Double-check that you’re using a DisplayPort cable, Dual-Link DVI, or HDMI 2.0 (or higher) cable. Swapping out a cheap or old cable for a certified, high-quality one often resolves this immediately.
Persistent Display Problems
If the cable isn’t the issue, consider your graphics drivers again. Sometimes, a driver installation can become corrupted, or new Windows updates can interfere. A “clean install” of your graphics drivers (using DDU – Display Driver Uninstaller – to completely remove old drivers before installing new ones) can often resolve stubborn display issues. Also, ensure your monitor’s drivers are installed; while less common, some monitors benefit from specific driver packages provided by the manufacturer.
- No 144Hz Option:
- Verify cable type (DisplayPort, Dual-Link DVI, HDMI 2.0+).
- Update graphics card drivers (consider a clean install).
- Check monitor settings (OSD) for a refresh rate cap.
- Ensure your GPU supports 144Hz at your chosen resolution.
Screen flickering or intermittent display blackouts at 144Hz can suggest a few things. It could be an unstable overclock on your GPU, although this is less common. More likely, it might be an issue with the cable, especially if it’s too long or poorly shielded. It could also point to a power delivery issue or a faulty port on either your GPU or monitor. Try a different port on your GPU and, if possible, test the monitor with another system to isolate the problem.
Another issue might arise with adaptive sync technologies (G-Sync or FreeSync). If enabled, and you’re experiencing stuttering or flashing, ensure you have the latest drivers and that the settings are correctly configured in both your GPU control panel and the monitor’s OSD. Sometimes, disabling and re-enabling these features can resolve minor glitches. Also, check to see if there are any specific game profiles for your monitor or GPU in the driver software that might be overriding your desired settings.
In summary, troubleshooting 144Hz issues requires a systematic approach, starting with the most common culprits. From verifying cable integrity and driver stability to checking monitor firmware and in-game settings, each step helps narrow down the problem. Persistence in this process will ultimately lead to a smooth, uncompromised 144Hz gaming experience, ensuring your investment pays off in competitive advantage and visual fluidity.
Beyond 144Hz: Advanced Optimizations
Once you’ve successfully unlocked and optimized for 144Hz, you might wonder what more can be done to enhance your competitive gaming experience. While 144Hz provides a significant leap, there are several advanced optimizations that can further refine your setup, pushing the boundaries of responsiveness and visual clarity. These aren’t necessarily about increasing refresh rate, but rather about ensuring every component works in perfect harmony to eliminate bottlenecks and minimize latency.
One such optimization involves input lag beyond the display itself. Your mouse and keyboard can introduce latency. High-end gaming peripherals often boast lower response times and higher polling rates (e.g., 1000Hz), which means they communicate with your PC more frequently, translating your physical inputs into digital actions faster. While the difference might be measured in milliseconds, in competitive scenarios, these small gains accumulate and can be decisive.
System Performance Tweaks
Beyond peripherals, system-level optimizations play a critical role:
- Disable Unnecessary Background Processes: Close any applications or services running in the background that aren’t essential while gaming. These consume CPU, RAM, and GPU resources that could otherwise be dedicated to rendering your game.
- Game Mode (Windows): Ensure Windows Game Mode is enabled (Settings > Gaming > Game Mode). This feature prioritizes your game’s resources and can improve stability.
- Overclocking (CPU/GPU/RAM): For advanced users, carefully overclocking your CPU, GPU, or RAM can provide a measurable boost to overall system performance, directly impacting average and minimum frame rates. This should be done carefully and with proper cooling.
- Fast Startup/Ultimate Performance Power Plan: Disabling “Fast Startup” in Windows can sometimes resolve strange boot issues, and setting your power plan to “Ultimate Performance” (or “High Performance”) ensures your CPU doesn’t throttle during intense gaming sessions.
Network latency (ping) is another critical factor, often overlooked in display discussions. A low refresh rate monitor won’t save you if your connection to the game server is poor. Optimize your network by using a wired Ethernet connection instead of Wi-Fi, ensure your router’s firmware is updated, and close bandwidth-intensive applications while gaming. Prioritizing game traffic through QoS (Quality of Service) settings on your router can also help.
Finally, consider the concept of “frame time consistency.” While hitting 144fps is good, maintaining a consistent frame time (the time it takes to render each frame) is even better. Tools like CapFrameX or MSI Afterburner can log your frame times, helping you identify hitches and stutters that might not be obvious from average FPS alone. Optimizing your game settings to flatten your frame time curve, rather than just maximizing average FPS, leads to a perceptibly smoother experience, as it minimizes micro-stutters and improves input responsiveness.
In conclusion, while 144Hz is a major milestone, the journey toward ultimate competitive gaming performance involves a holistic approach. By fine-tuning everything from your input devices and operating system settings to network conditions and frame time consistency, you can squeeze out every last drop of performance, transforming your gaming setup into a finely tuned machine built for speed and precision. These advanced optimizations ensure that you’re not just capable of 144Hz, but that you’re consistently experiencing its full, uncompromised potential in every competitive engagement.
| Key Optimization | Brief Description |
|---|---|
| 🔗 Cable Check | Ensure you’re using DisplayPort, Dual-Link DVI, or HDMI 2.0+ for 144Hz. |
| 🖥️ Windows Settings | Manually set refresh rate to 144Hz in Display Adapter Properties. |
| 🎮 In-Game FPS | Balance graphic settings to achieve consistent 144+ FPS in games. |
| ⚡ Driver Updates | Keep GPU drivers and monitor firmware updated for optimal performance. |
Frequently Asked Questions
▼
144Hz provides significantly smoother visuals and reduced input lag compared to 60Hz. This fluidity allows for quicker reaction times, better target tracking, and a more precise aiming experience, which are all crucial advantages in fast-paced competitive titles where milliseconds can determine victory or defeat.
▼
DisplayPort (DP) 1.2 or newer is generally the recommended and most reliable cable for achieving 144Hz, especially at higher resolutions like 1440p. Dual-Link DVI-D also supports 144Hz at 1080p. While HDMI 2.0+ can support it, DisplayPort offers broader compatibility with adaptive sync technologies and often more stable performance.
▼
First, ensure Windows is set to 144Hz. If the game still doesn’t show it, try setting the game to fullscreen mode (not borderless windowed), update your graphics drivers, and check your monitor’s On-Screen Display (OSD) settings for any refresh rate caps. Sometimes, reinstalling the game or verifying its files can help.
▼
To consistently reach 144 frames per second (fps) in games, you will need a relatively powerful GPU. While your monitor can display 144Hz, your GPU needs to render frames at that rate. For modern competitive games at 1080p, a mid-range GPU is often sufficient, but for 1440p or higher, a high-end GPU is crucial to maintain high frame rates.
▼
While 144Hz drastically reduces screen tearing and makes motion much smoother, it doesn’t eliminate them entirely without adaptive sync technology. For truly tear-free and stutter-free gaming, ensure your monitor supports NVIDIA G-Sync or AMD FreeSync, and that these features are enabled in both your GPU control panel and monitor settings, as they synchronize the refresh rate with your fluctuating FPS.
Conclusion
Unlocking the full potential of a 144Hz monitor is a transformative step for any competitive gamer, elevating the visual experience and providing a tangible competitive advantage. From the initial understanding of refresh rate’s impact to the detailed steps of hardware verification, Windows configuration, driver updates, and in-game optimization, each phase is integral to achieving and maintaining peak performance. While the journey may involve some troubleshooting, the payoff—a silky-smooth, responsive, and immersive gaming experience—is well worth the effort. By meticulously following these guidelines, you’re not just upgrading your display; you’re fundamentally enhancing your ability to react faster, aim more precisely, and ultimately dominate the competitive arena, ensuring that every millisecond counts in your favor.


")
